OCTOBER 10TH, 11:54pm
And now, after some tinkering, the refined image:

Working with and learning a new engraver can be a little tricky. I'd need to do some thinking on how best to get this done right.

A hard lesson I learned is that you absolutely cannot give even the slightest nudge at any point while the engraving is going. A door slam or a gust of wind could ruin the whole process.

Results: Not great. It goes through in some parts, but doesn't make it through the tape in others. FAILURE.

Better but not there yet...

Results: Acceptable. It's a but darker than I'd like, but that's not going to matter once it's painted.

Results: Yup.jpeg

This was the best results I got with the finest of details.

Still not enough. I needed

On second thought, not that much.


The wife & I are in the basement working together on our separate business ventures. Our baby is on the floor atop some blankets behaving well; alternating between laughing, crying, & eating his foot. That's about when we hear a familiar, yet puzzling sound.
A distinct "Cha-CHING" blasting out of my phone whilst it lay upon the counter; undisturbed for some time.
We shot a confused look towards each other, honestly baffled at what we'd heard.
Did I win a sports bet? Nay. Nothing was going on this late.
Oh of all things, what could it be?
Confusedly, I checked my phone to discover that the noise had come from the Etsy App. I had finally done it. My first sale.
Well technically a swell gentleman from New England had done it. We were damn excited it was so!
6* DAYS TO SHIP
The first steps with a custom item relies on proper communication.
The way these Custom Character Dice Trays/Boxes work, you have to make sure you're giving exactly what's asked for, or hopefully better. The first thing is to get a rough draft of the custom engraving.
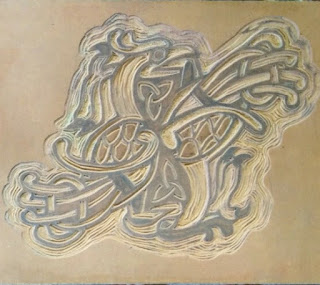
The image given for this one was interesting. The design started out as a carving.
I would have to convert that into a general design on my pc to start with and refine.

I tinkered around for an hour or so and at this point in the night, roughly 2 am. I called it a morning & went to bed.
Gotta keep a normal sleep schedule if I'm going to fulfill my DJ duties at my sister-in-law's WEDDING THIS COMING WEEKEND...
Gotta keep a normal sleep schedule if I'm going to fulfill my DJ duties at my sister-in-law's WEDDING THIS COMING WEEKEND...
5 DAYS TO SHIP
After waking up, I checked my etsy app. It hadn't been a dream. I did have an order and right there were 5 days to ship. I could do that.
There was no room for error, for if there was, I'd have to delay the order an entire week because the shipping date was the day before we had to go on a 5 hour trip for the previously mentioned wedding.
This added no stress. No, none; whatsoever.

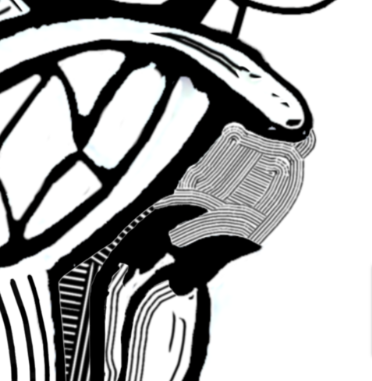
I attempted to get this result in several different ways. Including making a new layer and tracing, as well as several other ways before I just used the magic wand tool, and colored it in black. Then spent a good amount of time erasing and filling in different areas. It may surprise you to learn this was not fast, nor easy. I would not be surprised if there was an easier way to do this, however I am unfortunately not acquainted with it..
(I continued to work and refine this design up into RIGHT BEFORE THE FINAL ENGRAVING! Seriously!)
Next, I grabbed a nice box, sanded it well, and stained it as requested. Gunstock (actually was originally labeled as "Gunmetal" on my store incorrectly)
It took a few stains. At the same time, I also did the same to a dice box; a matching gift as a way of saying thanks for being my first customer.
I did more tweaking to the design while I waited on the stains, eventually wiped off the excess and let it dry. Then repeated until I had the desired look.
Tomorrow I would begin to seal it in and make it nice and shinny.
4 DAYS TO SHIP
After applying a first coat of polyurethane, I went back to work on the design.
My goal was to capture details of the carving from the original image. It had carvings going all the way around it but I felt that detail should be contained to one area: between the claws and Celtic knots, rather than be scrapped altogether. Anything more than that and one could get lost on what should have what where... If there, why not there?? Why not all around like in the original design???
I made an estimate on how much time I had and whether or not doing the carving pattern all around was worth pursuing. Every creative decision has a sacrifice. In mock-ups I had found that it decreased the overall size of the phoenix to fit on the box. It just didn't look as good or as clean. This is a phoenix we're doing here, after all. Fire is the ultimate cleanser. It must be clean.
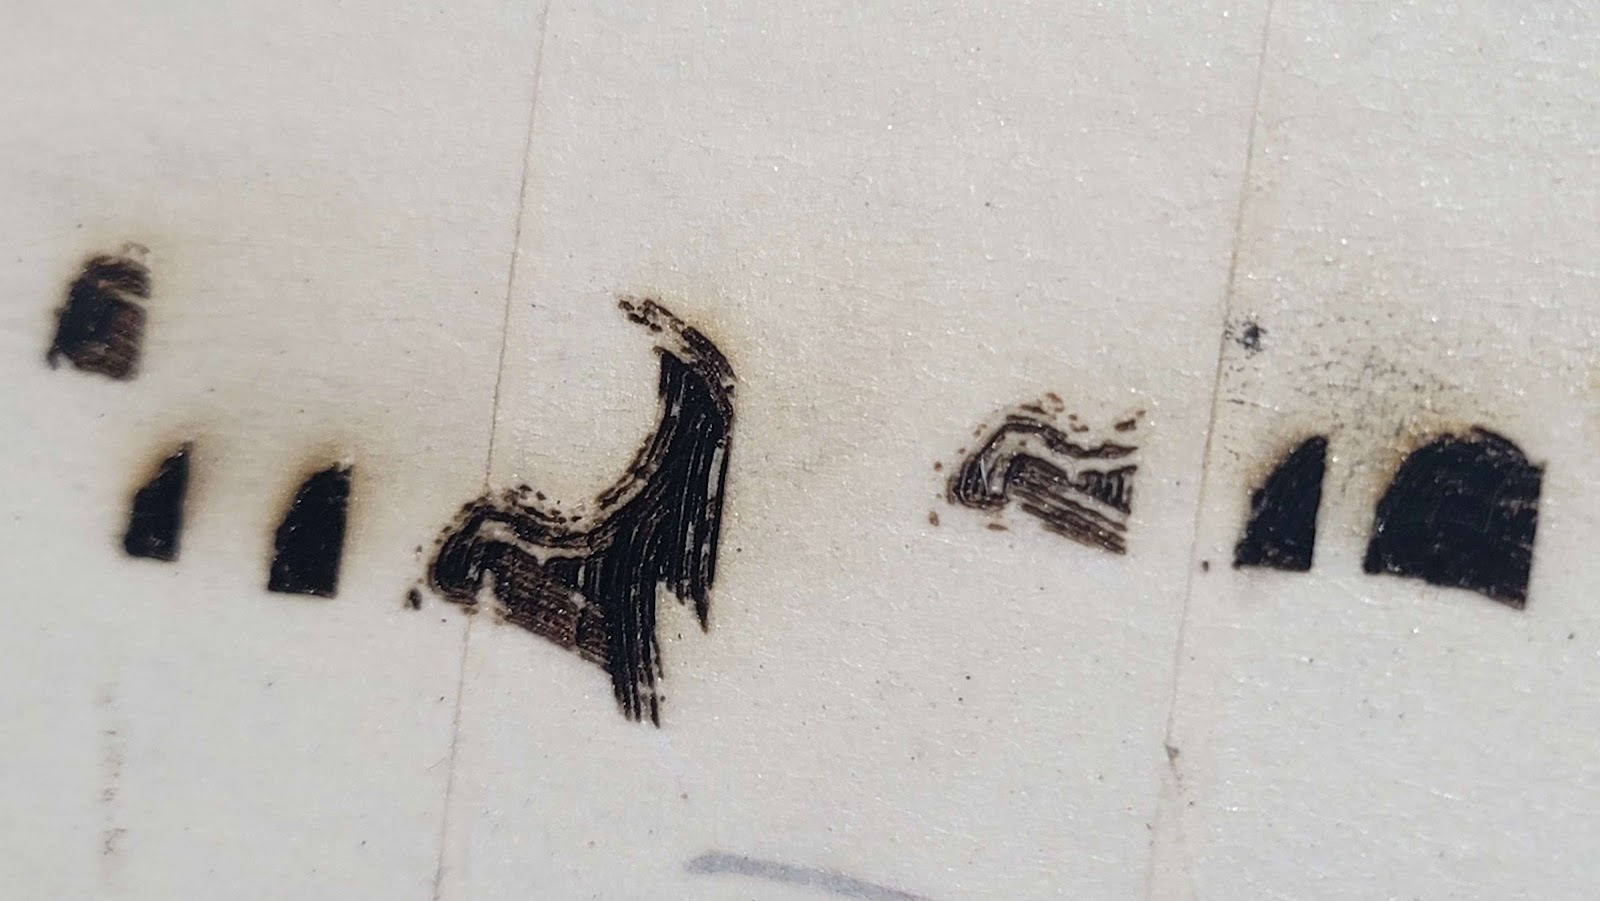
After working on the look of this area, I did some test engravings for the details. They came in kinda hot.
Working with and learning a new engraver can be a little tricky. I'd need to do some thinking on how best to get this done right.
3 DAYS TO SHIP
The next morning, I checked the wood box that I had polyurethaned; sticky.
That was going to be an issue because with my deadline, It left me no room, whatsoever, for any error. On top of that, if it takes an entire day or TWO to completely dry.... There's a good chance, mighty good chance, okay, there's a certainty it wont be ready in time.
I needed at least 3 or 4 coats to get this thing to be the spiciest meatball a non-Italian chef can 👌ah-make-ahh👌
So I brought in an expert.
A 75 pint De-Humidifier. That took a 48 hour-to-dry job down to, oh say, 3 hours. Now we were cookin'.
Now to get back to nailing the details on the graphic design. I had come to the conclusion that the best course of action was to do 2 passes on the engraving.
1st pass was for the Wording and overall image.
2nd pass was to get the finer details that needed to be at a different power than the first pass.
A hard lesson I learned is that you absolutely cannot give even the slightest nudge at any point while the engraving is going. A door slam or a gust of wind could ruin the whole process.
Another hard lesson was that you have to have (at least with this engraver, the Crealty 10w) the layers set up to go from one click of the start button.
You can't (or shouldn't) do a basic pass at one power/speed, then setup another layer at a different ratio and hit start again.
For whatever reasons it just will not line up correctly and you'll have a misprint that'll break your heart. You have to have both layers ready to go and then hit 'start.'
With the first pass, I wanted to get the wording just right. That would inform how the rest would look.
This was a little difficult in my specific case because I wasn't using normal masking tape. I was using a giant roll of transfer tape that looks exactly like masking tape but it is thicker (for those wondering why you use masking tape at all on engravings, it's because it'll soak up all the burn marks from the laser and prevent it from getting on the product).
Here's test #1
Note: This is a balancing act. Too little power, you get this. Too much, your table will always have a lil message just for you singed on it. Now, throw on top of that different speeds.
Some engravers can go very fast and give perfect results. Those engravers are bigger than your oven and are expensive. I do not own one of those engravers.
I want to.
I want to.
But for now I have to use what I have, and what I have takes a long time to get great results.
The final print took approx. 5 hours and 30 min.
At one point in doin experiments to find the best results, one print took over 14 hours.
Trial by fire, baby.
Test #2
Test#3
Results: Acceptable. It's a but darker than I'd like, but that's not going to matter once it's painted.
Now to make sure the body of the graphic design engraves as desired.
2 DAYS TO SHIP
This day is mostly a blur. I remember having certain things down pat and being beaten down by others. At one point I considered excluding the details layer altogether. I hated the notion. But test after test I just could not find the right speed to power ratio to get it to work properly.
Too little and you get this. Mind you, once you pull off the tape, any burn marks that look nice are also gone.
Still not enough. I needed
Results:
On second thought, not that much.
1 DAY TO SHIP
By this point I had been staying up until 4 am or later. Really messing up my schedule for the wedding. I determined, in a most determined fashion, that I would pull an all-nighter and get this order finished come hell or high water & mailed off by the time the post office closed @5pm *tomorrow.*
I would then have 3 hours where I could struggle to stay awake to have a nice long sleep before leaving town in the morning.
Boy, was I silly to think that was happening.
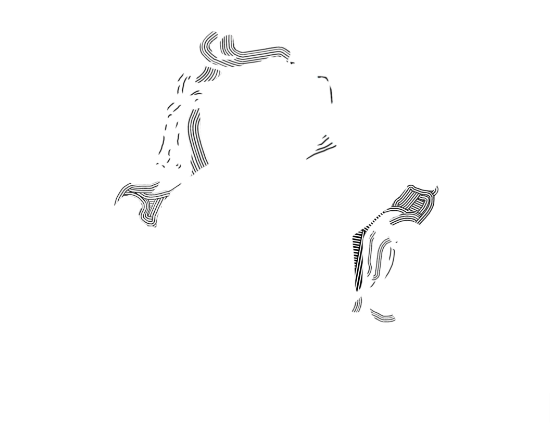
What actually happened was I struggled, in vain, to find the right power setting of the details layer. I never found it and it wasn't until the end when I decided to take this:
and turn it into this:
My detail layer before was simply too fine to engrave, and if it had worked, it would have been too fragile. It was a difficult lesson to learn so late, because now that I was getting successful test prints off, everything should then, theoretically, work.
In the time after the experiments led me to the right speed/power ratios for both layers, I was able to engrave the Dice Box & Back inscription of the main box.. They came out perfectly and I was so proud.
Surely I could get the front engraved in time now, right? The final engraving will only take 5 hours and 28 minutes. Post office closes at 5pm.
(Mind you, I had worked through the night & well into the next day, taking naps allong the way well engravings were in progress)
Aaaand it's already 1:45pm on
SHIPPING DAY!

I informed my wife of this, that we wouldn't be able to send the order in time; that it would delay our departing time for the wedding, and we shared disappointment and pondered our options. We rescheduled some things and got back to work.
Overall the engraving was a smashing success and assembly went well enough. I was, and am, super proud of the results:

(The box on the left is the DM's "So Your Adventurer(s) Forgot Their Pencil" Pencil Pack
Coming very soon!)
-1 DAYS TO SHIP
I had pulled an all-nighter in order to get it to the post office by 5pm on shipping day. I failed.
but now we had some extra time to make the order really 'pop.'
In the box, with our extra time and effort, we put in
- The Main Custom Trox
- Matching Dice Box
- A DM's "Your Adventurer Forgot Their Pencil" pencil pack
-Stickers
- A thank you note with a business card and discount code for future purchases.
I wanted the experience of opening our product to be like that of opening a new gaming console or iPhone.
All inside a wonderful cloth pouch.
As well as a nice big logo sticker for the front of the box.
We left for Wisconsin at 1:45pm, and along the way dropped off the package at the nearest post office.
I was and am incredibly proud of what we were able to accomplish and of the products themselves. I must admit that a part of me was down that I had made something so cool and I now had sent it away.
Epilogue
In the end, everything worked out for the utmost best.
However, I can't help but 'channel' George Lucas and ponder all the things I could have done differently.
You see, under the phoenix I always intended to put in an army of dewbacks riding through the dune sea but had to cut the idea it due to time and budget constraints. Perhaps in a future special edition order.

Thankfully the client/customer was an absolute pleasure to work with. With this being a collaborative process, I'm so happy my first sale was with who it was with. I feel encouraged to continue this path that I've set upon by this wonderful & fulfilling experience. I'm excited for what the future brings.